Sourdough Harvest Loaf Recipe
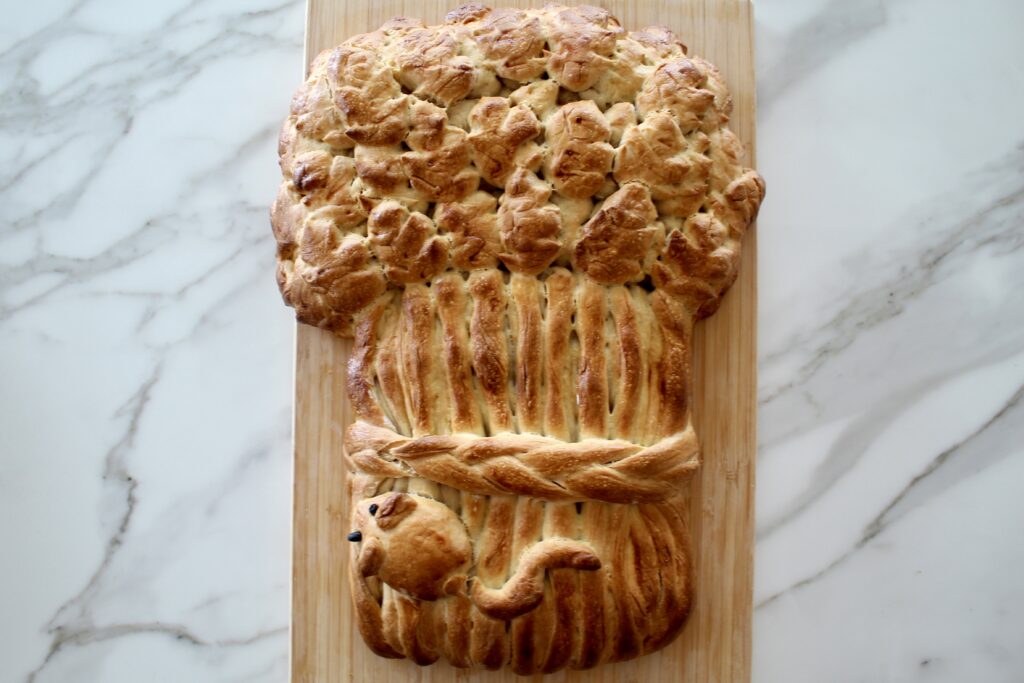
Celebrate the arrival of autumn with this stunning sourdough harvest loaf. Adorned with an intricate wheat sheaf design, this festive bread will be the centerpiece of any autumnal meal.
I love marking our family’s seasonal rhythms by baking bread. I have a special recipe for many of the festivals we celebrate throughout the year, but it dawned on me this year that I don’t have one to mark the arrival of autumn.
While researching autumnal bread recipes, I stumbled on a beautiful harvest bread featuring a wheat sheaf design. Festive and dignified, I thought this would be the perfect loaf to mark the transition from summer to autumn.
I read through and combined several instructions on creating the wheat sheaf design, then adapted my favorite sourdough recipe and decided to give it a go. Having no expectations for such an impressive-looking bread, I was surprised how easy – albeit time-consuming – it was to assemble. I was even more surprised at how beautiful the end result was. This sourdough harvest bread is a definite winner and one I plan to make each autumn from now on.

Lammas – The Bread Festival
The harvest wheat sheaf loaf has traditionally been made for Lammas, or Loaf Mass Day, which falls on August 1st — midway between the summer solstice and the autumn equinox. This Christian holiday celebrates the blessing of the first fruits of the harvest, particularly grains. Over the centuries, many special bread recipes have been developed for Lammas, including those with a wheat sheaf design.
As an avid bread baker, I was excited to learn about a holiday centered around bread. However, the timing of Lammas doesn’t quite work for our family. While August traditionally marks the start of the grain harvest season, it is also when we (non-farmers) do our summer travels. So, I decided to bake this loaf at the beginning of September instead, which is when we transition out of summer and begin to welcome autumn. By baking the Lammas loaf a month later, I was hoping to create a new family custom that blended a time-honored tradition with our seasonal rhythms- and I think I’ve done just that!
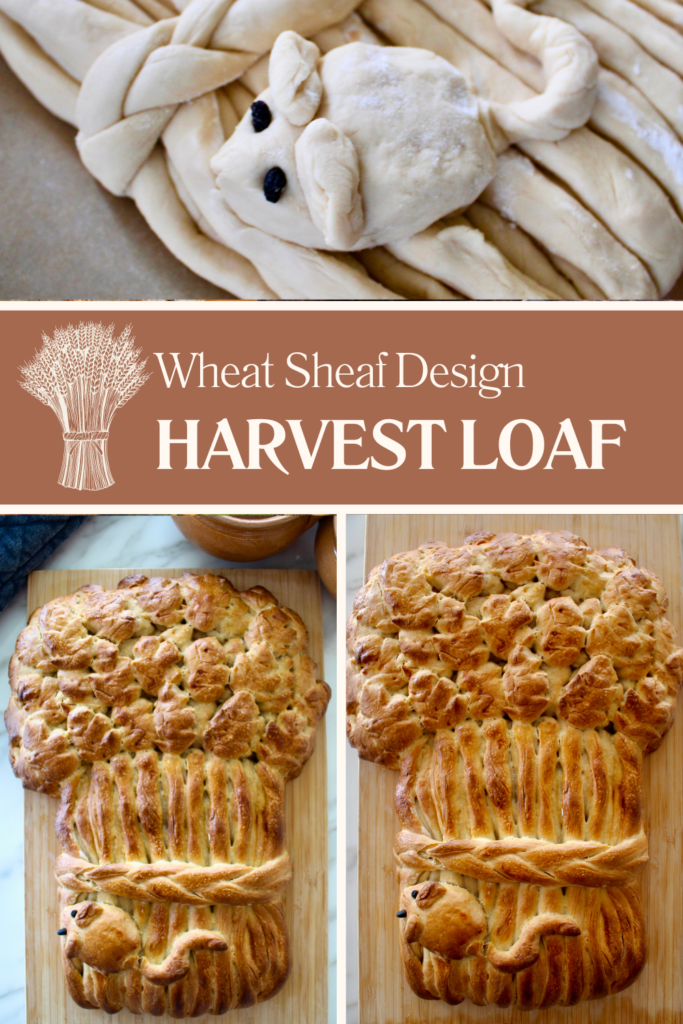
Step-by-Step: Making a Wheat Sheaf Harvest Loaf
The day before you plan to make this harvest bread, feed your sourdough starter in the morning. In the evening, prepare your dough and let it rise at room temperature overnight. By the next morning, you’ll have a well-risen bread dough, ready to be shaped into a wheat sheaf.
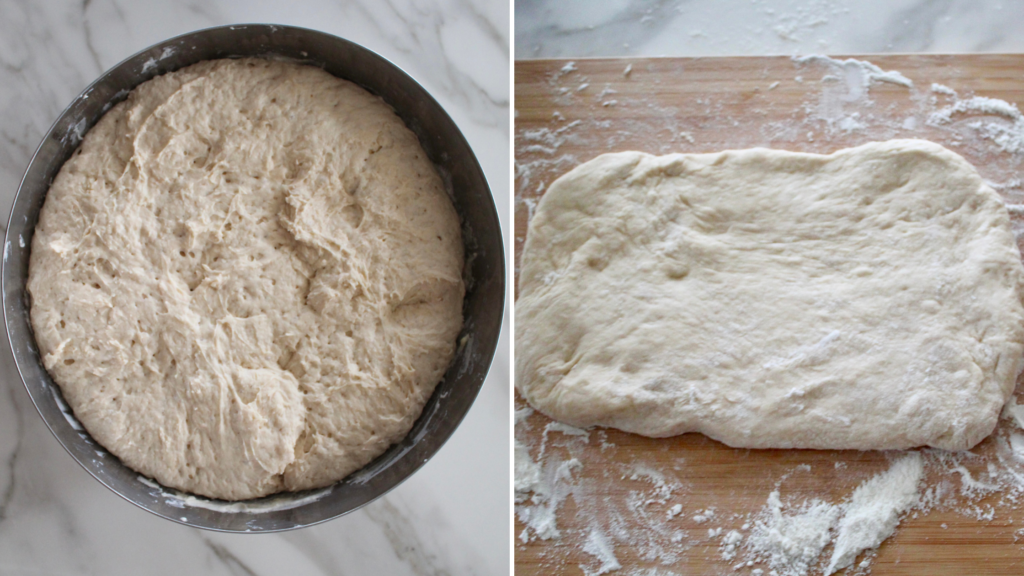
Next, weigh your dough and divide it into four pieces: two pieces at 15% of the total weight each, one piece at 20%, and one piece with the remaining 50%.
Shape the two pieces at 15% into two rectangles, roughly 24×14 cm. Place one rectangle vertically on a large baking sheet to form the base of the sheaf. Place the other rectangle horizontally on top, stretching out the ends slightly to resemble a mushroom-like cap. Prick the dough all over with a fork, then cover with a damp cloth while you prepare the stalks.
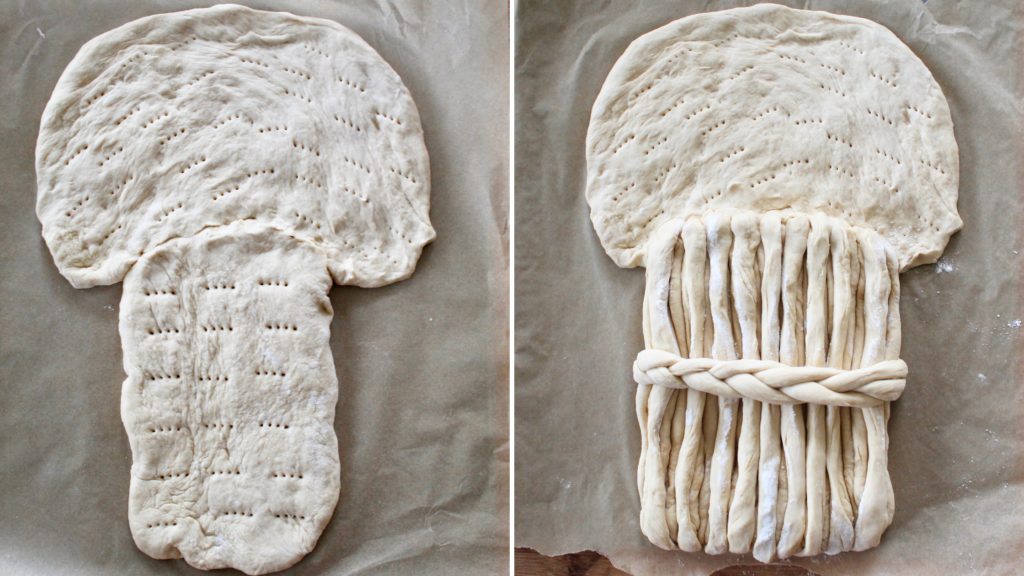
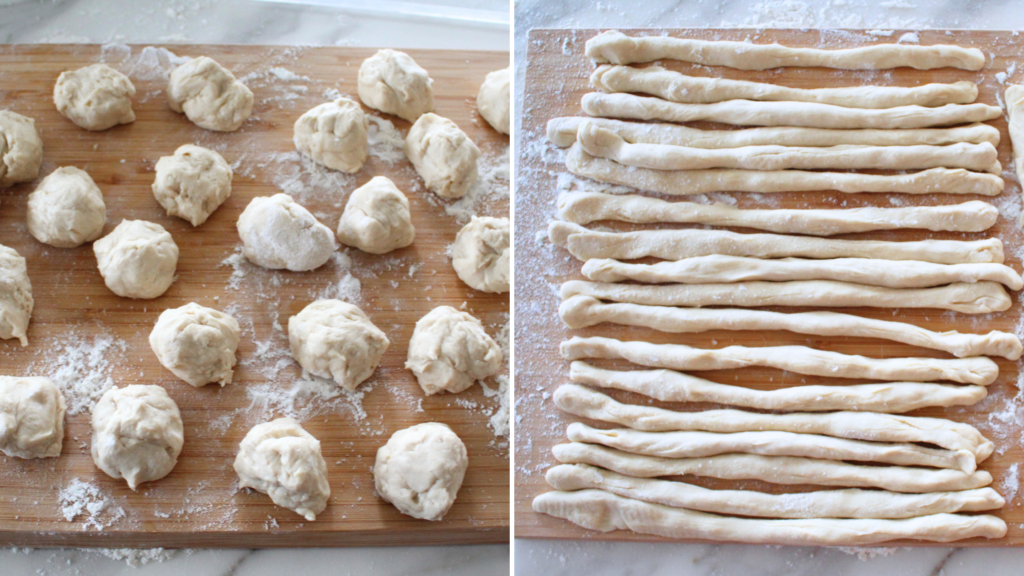
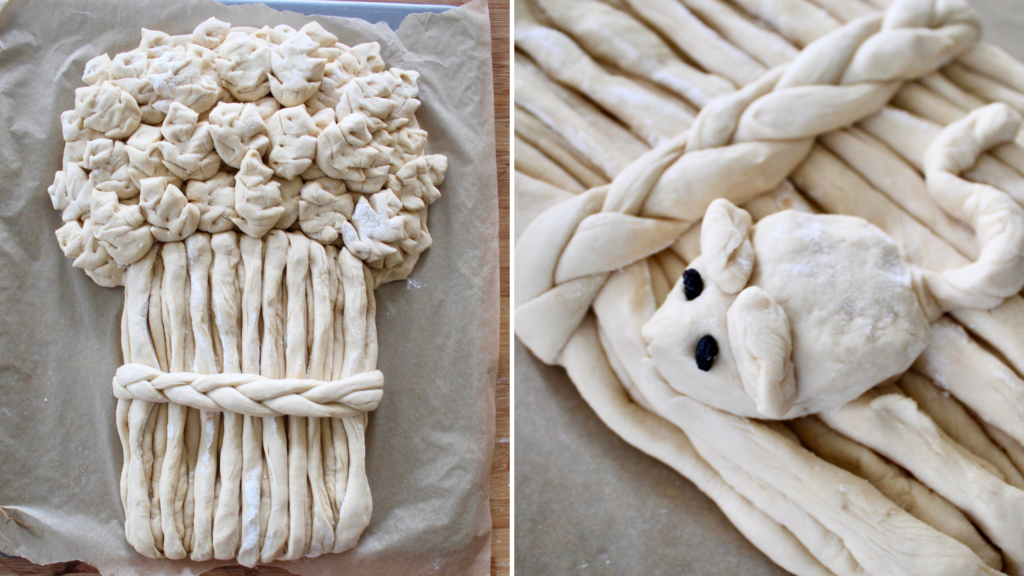
To create the stalks, divide the 20% piece of dough into 30 balls (approximately 22 grams each). Roll each ball into thin stalks about 24 cm long. Arrange 27 of these stalks on the base to form the wheat stalks. Braid the remaining 3 stalks and wrap them around the others, tucking the ends underneath.
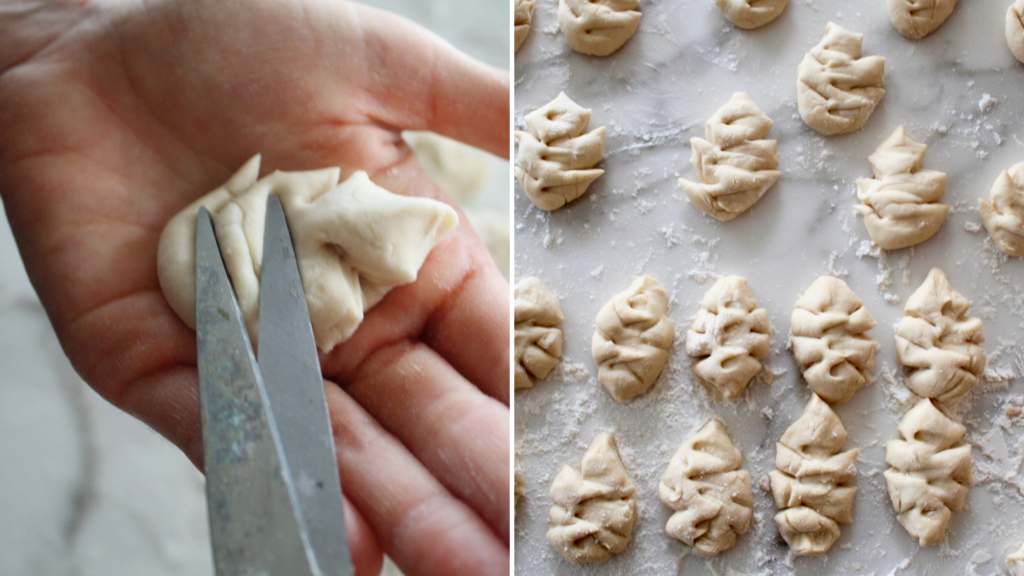
Preheat your oven to 250 C (480 F). Next, use the remaining piece of dough to create the ears. Divide it into 50 pieces, each weighing about 16 grams. Roll each piece into an oval shape, pinch one end, and make two cuts on each side and towards the base to form the ear’s distinctive shape. Place them loosely on the top of the wheat sheat.
Use the remaining dough to create a little mouse by shaping a body, two ears and a tail. Add two raisins for the eyes and place the mouse on the wheat stalks. Finally, brush the entire bread with the egg yolk and milk mixture.
Reduce the heat to 190 C (375 F) and bake for around 45-50 minutes, or until golden brown. Place the loaf on a cooling rack and let it cool completely before tucking in!
One final note about this recipe. My aim was to create a harvest loaf that was both beautiful and delicious, which meant a few cracks were unavoidable. To minimize cracks, place any dough you are not actively working on in the fridge and preheat the oven to 190°C, rather than starting at 250°C and then reducing to 190°C. This approach should create a smoother surface, but may result in a denser loaf.

Sourdough Harvest Loaf Recipe
Equipment
- 1 bowl
- 1 large baking sheet (or use a baking stone if you have one)
Ingredients
- 1250 g white wheat flour (I used German W 700 flour, but white bread flour will work instead)
- 675 g water
- 30 g sugar (I used brown sugar)
- 20 g salt
- 180 g butter (room temperature)
- 150 g active bubbly sourdough starter
- 2 raisins (optional eyes for the mouse)
Instructions
- The day before making the harvest loaf, feed your sourdough starter in the morning.
- The evening before baking the harvest loaf, prepare the dough. In a bowl, add all the ingredients and mix them well. Let the dough rest for 30 minutes and then knead the dough by hand for 10 minutes or until smooth and elastic.
- Cover the bowl and let it rise for 12 hours.
- The next morning, weigh your dough and divide it into four pieces: two pieces at 15% of the total weight each, one piece at 20%, and one piece with the remaining 50%.
- Shape the two pieces at 15% into two rectangles, roughly 24×14 cm. Place one rectangle vertically on a large baking sheet to form the base of the sheaf. Place the other rectangle horizontally on top, stretching out the ends slightly to resemble a mushroom-like cap. Prick the dough all over with a fork, then cover with a damp cloth while you prepare the stalks.
- To create the stalks, divide the 20% piece of dough into 30 balls (approximately 22 grams each). Roll each ball into thin stalks about 24 cm long. Arrange 27 of these stalks on the base to form the wheat stalks. Braid the remaining 3 stalks and wrap them around the others, tucking the ends underneath.
- Preheat your oven to 250 C (480 F).
- Use the remaining piece of dough to create the ears. Divide it into 50 pieces, each weighing about 16 grams. Roll each piece into an oval shape, pinch one end, and make two cuts on each side and towards the base to form the ear’s distinctive shape. Place them loosely on the top of the wheat sheat.
- Use the remaining dough to create a little mouse by shaping a body, two ears, and a tail. Add two raisins for the eyes and place the mouse on the wheat stalks.
- Brush the entire bread with the egg yolk and milk mixture.
- Reduce the heat to 190 C (375 F) and bake for around 45-50 minutes or until golden brown.
- Place the loaf on a cooling rack and let it cool completely before tucking in!
